How To Setup Networked Blogs to syndicate (push) your blog posts to Facebook and Twitter.
If you want to have your Spark Pay online store blog automatically syndicated to your Facebook and/or Twitter account, you can use NetworkBlogs.com to do this for you. The following article will walk you thought the steps to Setup network blogs and confirm your syndication within the Spark Pay online stores blog.
Setup Network Blogs
1. Go to NetworkBlogs.com and choose the "Register a blog" link and then add your blog link.

You will then be prompted to login with Facebook using your Facebook Login Credentials.

Select "Okay"
You will then be brought to your account home. Select the "Manage" tab to add your blog (Or the "Register a Blog" link at the top)

Select "Register A New Blog".


Select "Next" and then follow the next steps to Register your blog.

Click "Yes" if you are the author of the Blog you are registering.

You now have two options to prove to network blogs that this is your blog and you can synidcate it. Either ask friends or install a widget. In my experience asking friends is slow and unreliable. So, the rest of this tutorial walks you through the "Install the widget" route. It's quicker to setup and verify your syndication.
The next steps require putting code from network solutions into your theme via your admin - It's not too hard.

Click in the box and copy the code.
Now login to your Spark Pay online stores Admin and choose your active theme (it's under your main "Theme" link). When you are in the theme system, select the main link on the left called " Pages" and then click "Blog Roll".

When you click "Blog Roll", you'll get another list of links. Select "HTML Editor" and the area to the right of the links will reload with HTML code.

As you'll notice, when you scroll the HTML page all the way to the bottom, it ends with
< / div >
< / ac:widget>
< / ac:widgetarea>
< / ac:pagelayout>
Depending on your theme, these last 20 lines or so will be very different. That's ok. Your goal is to find the very last < / div>. At the end of the closing div tag is where you want to put your cursor.
Click behind the last </div> tag and paste your network blogs code here.

On Networkedblogs.com make sure you copy your code.
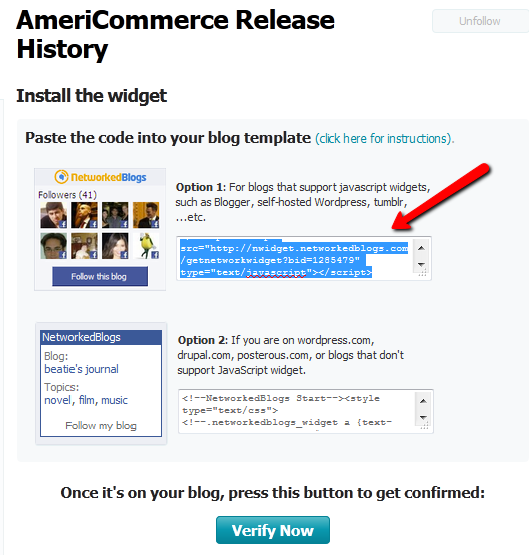
Paste your code. This will be a very big block of code that looks something like this.

Make sure to click "save" in the top right of your Spark Pay online store Admin.

Return to your NetworkBlogs.com page and click the "verify" button. Then wait a second for NetworkedBlogs to check the blog roll link you gave it.
At this point, NetworkedBlogs is using the link to your blog roll and looking for this javascript code you pasted in your theme. That's the verification between your site and NetworkedBlogs.


Now that you have created the link to your blog roll, you want to syndicate all new blog posts to automatically push to your Facebook and/or Twitter account.
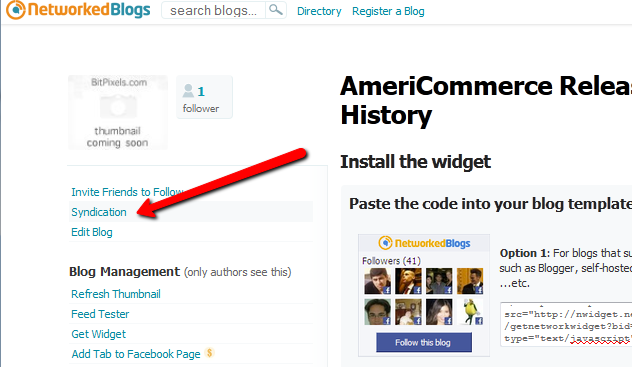
Click the "Syndication" link within network blots to start configuring your syndication to other sites.
Your Facebook page should show in the drop down list. Select the Facebook page (or profile) you want to have your blog posts automatically post too.
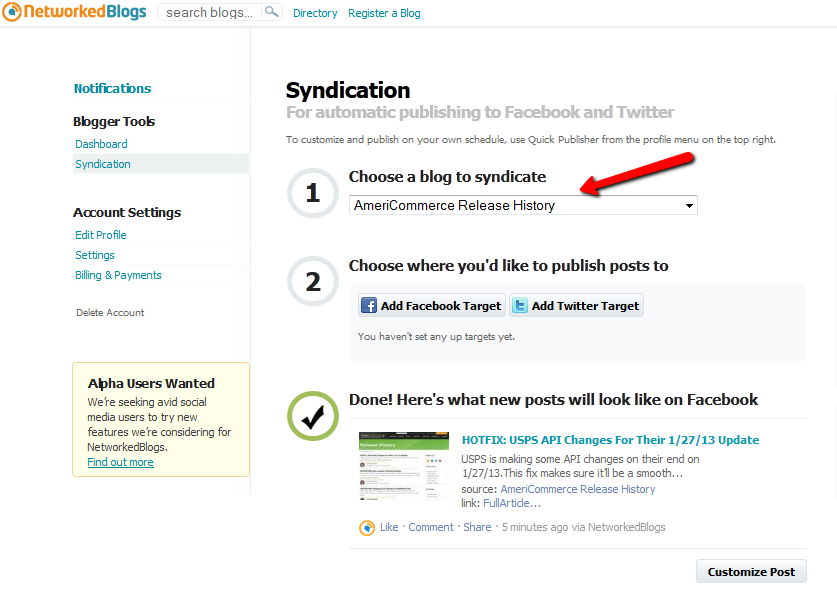
When you Click the Facebook link it pops open a syndication target - click "add" and your blog posts will automatically go to those Facebook pages/profiles.
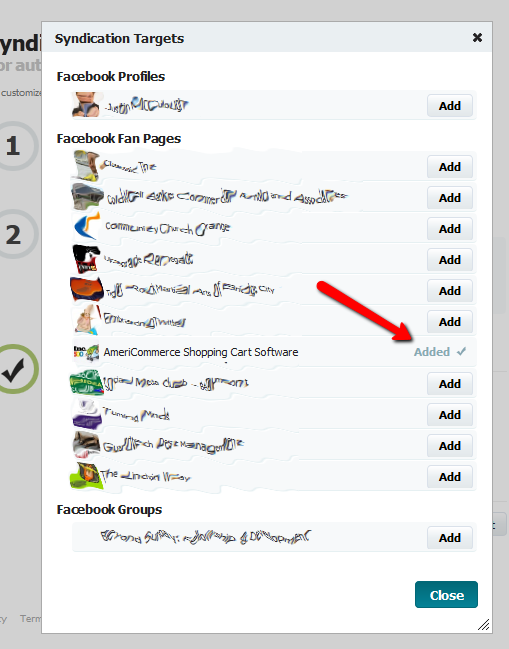
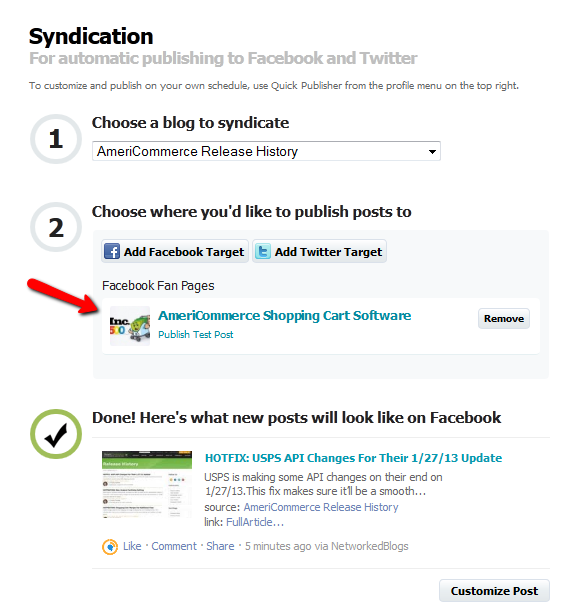
Once this is done, your Facebook Page will show as the target for your published posts.
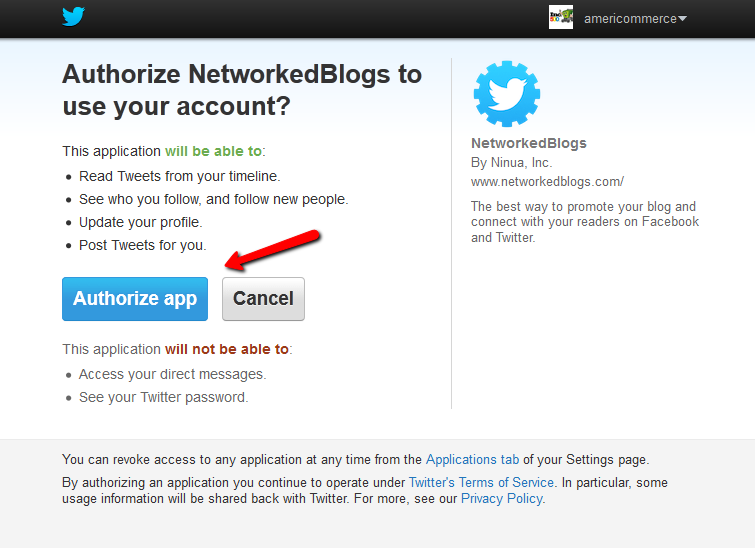
If you want to do this with your twitter account, click the link "add twitter target" and then when the twitter pop up loads, select "authorize app".
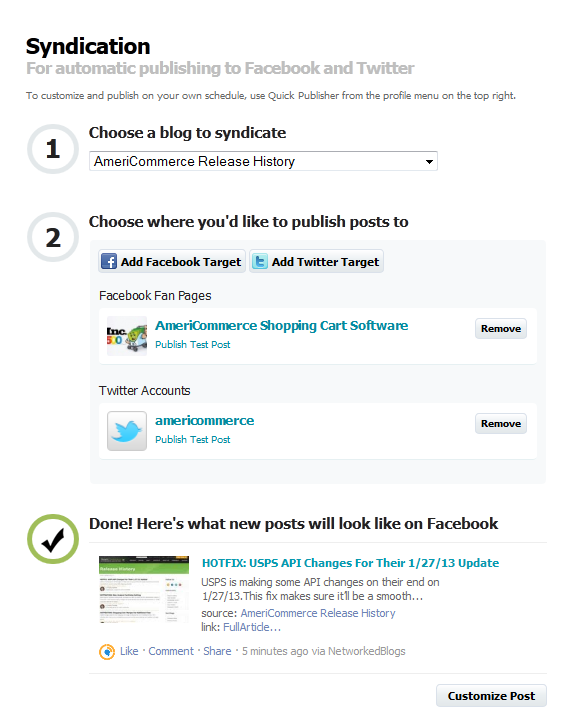
This will also show as a confirmed target to post too. That's it!
If you have any quyestions feel free to leave a comment below.